Astavakrasana, also known as Eight-Angle Pose, is a dynamic arm balance that requires a combination of strength, flexibility, and focus. Many yoga students find it intimidating at first, but with proper guidance and step-by-step progressions, even those new to arm balances can build the confidence to attempt this asana. If you’re wondering how to guide students into Astavakrasana in a way that feels safe, accessible, and rewarding, this article will walk you through the process.
Understanding Astavakrasana
What Is Astavakrasana?
Astavakrasana is named after the sage Astavakra, who was born with eight physical deformities but possessed immense wisdom. This pose embodies resilience and strength, making it a powerful practice both physically and mentally. The asana requires deep core engagement, arm and wrist strength, hip flexibility, and a strong sense of balance.
Benefits of Practicing Astavakrasana
Before diving into how to guide students into Astavakrasana, it’s important to understand its benefits:
- Builds upper body strength: Engages the arms, wrists, and shoulders.
- Strengthens the core: The obliques and lower abdominals work to hold the pose.
- Improves hip mobility: Encourages deep external hip rotation and flexibility.
- Enhances balance and coordination: Requires full-body engagement for stability.
- Boosts confidence: Overcoming challenges in arm balances helps build self-assurance.
Preparing Students for Astavakrasana
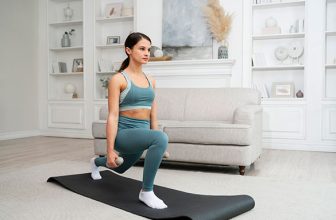
Warm-Up Sequences
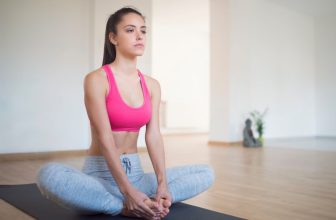
Astavakrasana demands flexibility in the hips, hamstrings, and spine, as well as strength in the core and arms. To set students up for success, start with the following warm-up:
Hip Openers
- Butterfly Pose (Baddha Konasana): Encourages external hip rotation.
- Lizard Pose (Utthan Pristhasana): Deepens the stretch in the hip flexors.
- Seated Figure-Four Stretch: Prepares the hips for the crossing motion in Astavakrasana.
Core Activation
- Boat Pose (Navasana): Strengthens the lower abdominals.
- Side Plank (Vasisthasana): Engages obliques and arms.
- Forearm Plank with Knee Tucks: Builds endurance and core stability.
Arm and Wrist Conditioning
- Chaturanga Dandasana Holds: Builds arm strength.
- Crow Pose (Bakasana) Prep: Helps students gain familiarity with arm balancing.
- Wrist Circles & Stretching: Prevents strain and builds wrist flexibility.
Step-by-Step Guide to Teaching Astavakrasana
Step 1: Starting in a Comfortable Seated Position
Have students begin in Dandasana (Seated Staff Pose) to align the spine and engage the core. From here, they should bring the right knee toward the chest and cradle the foot, warming up the hip joint before moving deeper.
Step 2: Placing the Leg Over the Shoulder
Encourage students to gently work the right leg over the right shoulder as if wearing it like a backpack. They should use their hands to support the movement while keeping the spine long. This step requires patience and flexibility.
Step 3: Planting the Hands and Engaging the Core
Once the leg is securely in place, students should plant their palms firmly on the mat, slightly wider than shoulder-width apart. Encourage them to press their hands down to activate the arm muscles and lift the chest.
Step 4: Crossing the Ankles and Lifting Off
The next step is crossing the left ankle over the right while keeping the feet active. With core engagement, students should lean slightly forward, lifting their hips off the mat. Remind them to keep their elbows slightly bent rather than locking them out.
Step 5: Extending the Legs and Maintaining Balance
Once lifted, students should begin to straighten their legs, squeezing them together for stability. Their gaze should be slightly forward, and they should maintain steady breathwork to stay centered.
Common Challenges and How to Overcome Them
Difficulty Getting the Leg Over the Shoulder
If students struggle with this step, encourage them to work on hip openers and hamstring flexibility before attempting the full pose.
Weak Core Engagement
If students can’t lift off the ground, they may need to strengthen their core. More work in Boat Pose, Plank, and Side Plank will be beneficial.
Wrist or Shoulder Pain
Pain in these areas can indicate a lack of proper alignment. Ensure students spread their fingers wide, press evenly through their palms, and avoid sinking into their shoulders.
Variations and Modifications
Beginner-Friendly Modifications
For those still working on strength and balance, try these adjustments:
- Use Yoga Blocks: Placing hands on blocks creates more space for easier leg placement.
- Keep the Bottom Leg on the Mat: Instead of lifting both legs, students can keep one grounded for support.
- Practice with a Spotter: A teacher or fellow yogi can offer support by holding their hips.
Advanced Variations
For students looking to deepen their practice:
- Try the Pose with Straight Arms: Engaging more upper body strength.
- Experiment with Floating Transitions: Moving into and out of the pose with control.
- Work Towards One-Armed Astavakrasana: A challenging and impressive variation.
Breathwork and Mindset in Astavakrasana
Focusing on Breath
Astavakrasana requires steady, controlled breathing. Instruct students to inhale deeply before lifting and exhale as they engage their core and extend their legs. Holding the breath can lead to unnecessary tension.
Cultivating a Growth Mindset
Encourage students to embrace the learning process. Remind them that arm balances take time, and falling is just part of the journey. Celebrating small progress will keep them motivated.
Conclusion
Knowing how to guide students into Astavakrasana is about more than just teaching a pose—it’s about fostering confidence, strength, and resilience. By incorporating proper warm-ups, clear step-by-step instructions, and mindful breathwork, you can help students feel empowered in their practice. With patience and dedication, they will find themselves lifting into Eight-Angle Pose with grace and ease.
So, the next time you introduce Astavakrasana in class, remember that progress is just as valuable as the pose itself. Happy balancing!